Friday, August 19, 2011
Diabetic Cookies - Eggless
My dad has diabetes...Ever since he was diagnosed with diabetes he loves sweets even more...
So i though why not try something healthy, sweet(sugar substitute), low calorie too..
I took the recipe for yo yo cookies from sharmi's passion...do check out sharmi's blog...she has absolutely beautiful collection of recipes with lovely photos .
I transformed that recipe to make healthy cookies with sugar substitute :)
Here is my recipe :)
Ingredients
Whole Wheat Flour - 1 cup
Sugarfree natura - 4 tbspn
Amul lite butter - 125 gms
Vanilla essence - 1 tsp
Vanilla flavoured custard powder - 1/4 cup
Method
Bring the lite butter to room temperature
Cream the butter with sugarfree natura and mix vanilla essence
shift custard powder and whole wheat flour and add it to the butter mixture
Now chill this dough for 20mins
Take it out and make it into small balls and flatten into 1/2inch thickness
Preheat the oven at 170C
Bake the cookies for about 15 mins.
Cool them in a wire rack and enjoy :)
I added apple green color to the cookies :P
Trust me my dad loved these cookies to the core...These are for sure lite and healthy too :)
Love,
Varshini
Thursday, August 11, 2011
Badhusha
This is a very very long post with loads of pictures....You might doze off in between :P
I always thought that making as such any Indian sweet was a difficult task..
not because of any difficulty in process but because of measurements...
Whenever I ask my Mom or Avva(That is how we call our Grandma) for measurements they always tell we don't measure ,its all eyeball measurements which comes out of years of experience...Which i totally lack
My hubby's favourite sweet is Badhusha....Anyone who doesn't have sweet tooth will still love Badhusha for its mild sweetness and great taste...
Few years back one of our neighbours asked a sweet master to come to their house to make sweets and ofcourse badhusha topped the list...I went to their house just to see how he makes it...
I found it very easy ..but then he didn't share the recipe with any of us because he said it was his Secret recipe...
Finally after i started blogging i started trying out various recipes from different bloggers...And i did make beautiful Badhushas finally...
I have tried with another recipe too...which gave me gr8 results to...mom , dad and dear hubby were like...WOW...superb...
This time i tried Badhusha Recipe from our dear RAK's Kitchen
Here is the Recipe :
Ingredients:
Maida/All purpose flour - 1 1/2 cups
Butter - 1/4 cup
oil - 1/8 cup
Sugar - 1/2 tsp
Curd - 1& 1/2 tsp
Cooking soda - 2 pinches
Water 1/4 cup (approx.)
Oil for deep frying
For Sugar Syrup:
Sugar 1/2 cup
Water Just to immerse the sugar
Elachi powder 2 pinches
Lemon juice - 1 tsp
Method:
Melt butter and mix oil,sugar,curd and cooking soda to it
Whisk the mixture well till it is frothy
Now add flour to the mixture and mix it till you get a crumbly mixture
Now add the water and mix it into a smooth dough and massage the dough for about 10 to 15mins
Now divide the doughy in to 12 equal balls
Now you can either make designer badhushas else the regular ones with a small dent in the center
for the designer ones
Take a ball and pinch the edges and fold it inwards to make rims decoratively
and keep it covered till they are ready for frying
For the sugar syrup in a heavy bottom vessel add sugar and pour water such that the sugar is just immersed and boil it till you get single string consistency and add cardamom powder and lemon juice to it
Now take a Kadai and heat the oil for frying the badhushas and keep it in medium heat , never over heat the oil
Now to test whether the oil is ready for frying throw in a pinch of dough and if it comes up immediately...Then oil is ready for frying
Now add 3 to 4 badhushas to the hot oil and switch of the flame and let it cook up in the already heated oil
After 4 to 5mins the badhushas will come up now switch on the stove and fry till they are golden in medium flame
Drain it in paper towel and add it immediately to the sugar syrup
Now coat the badhushas with the syrup and then take out and put them in a greased plate so that they don't get stuck to the plate
Enjoy eating...
Love,
Varshini
Labels:
badusa,
bashusha,
Indian Sweets,
sweet,
sweets
Monday, August 8, 2011
Coconut Chutney- Hotel Style
I am sorry again for not being regular...this time i was not in station for couple of days ...
I am finding excuses all the time...Plsssss my dearies accept my sincere apologies...
I guess still i will have at least one or two people reading this blog :P
I make this chutney regularly....Its very very easy to make and the quickest chutney...goes well with idli or Dosa :)
Recipe source : Self...After repeated experiments
Ingredients :
Grated Coconut - 1 cup
chillies (dried or fresh) - 3
Ginger - 1 inch piece
Salt to taste
For seasoning
Oil - 1 tbsp preferably Sesame (Gingelly) oil
Curry leaves few
Mustard seeds - 1/4 tsp
Method
In a mixie jar grind grated coconut, chillies, ginger, salt with little water
now transfer this grounded mixture to a bowl
Heat oil in a small kadai and add mustard seeds and curry leaves and let it splutter
now add this seasoning to the grounded coconut mixture
mix well and serve with dosas or idlies :)
Love,
Varshini
Sunday, July 31, 2011
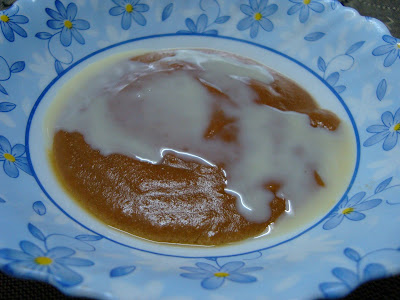
Caramel Pudding
I love Caramel Custard(Flan) a lot but then it is a little long process and has to be left in the refrigerator to set...I don't have patience...
That too when i was craving for caramel...
I went to dear google to find for me and found this simple recipe...
Its yummiest..if you love caramel you will die for this :P
So i took it from here
Smitten Kitchen
I halved the recipe also replaced cornstarch with Vanilla Custard powder :)
Ingredients
milk - 2 cups
Vanilla Custard Powder - 3 tbsp
vanilla extract - 1 tbsp
salt - a pinch
sugar - 1/2 cup
Method
In a bowl, whisk 1/2 cup of the milk with the Vanilla Custard Powder with vanilla and salt until smooth.
In a big vessel, add the sugar with 3 tbsp of water and bring to a boil.
Cook over moderately high heat, undisturbed, until a deep amber caramel forms.please don't move away from the stove at all till the caramel is ready
Remove from the stove immediately...Gradually add in the 1 1/2 cups of milk.
Now the mixture turns deep dark color..which is good
Now put the vessel back to the stove,till the milk boils and darkens even more.
Now mix in the custard mix and stir in till the the contents thicken and switch of the stove
Refrigerate for 2 hours and serve
I had it the condensed milk :D
Love,
Varshini
Tuesday, July 26, 2011
Chicken Tikka
My Hubby Loves chicken a lot....He always wants me to cook different dishes...
I wanted to try chicken Tikka for a really long time
This recipe gives you the Restaurant Style/Taste Chicken Tikkas
So here it is ...
Recipe Adapted(Modified According to taste) from: Sanjeev Kapoor's Book
Ingredients
Chicken Boneless - 400gms
Chilli Powder - 1 Tbsp
Garam Masala Powder - 1 Tsp
Ginger-Garlic - 1 Tbsp
Lemon Juice - 1 Tbsp
Curd/ Yoghurt - 1/2 cup
Salt
Olive Oil - 2 Tbsn
Method
Wash and cut the chicken into 1 1/2 inch pieces.
Now Mix Chilli powder, Lemon Juice and salt and marinate the Chicken for about 30mins
Now to the marinated chicken add yoghurt,Ginger Garlic paste, garam masala powder and marinate for 2 Hours
Now thread the chicken into skewers.
Heat Olive Oil in a tawa and place the skewers
Now cook the chicken by turning the skewers at regular intervals such that chicken cooks and browns evenly
When you see evenly browned chicken , Then its ready.
Serve it with a piece of Lemon.
Note:
Vegetarians can follow the recipe by replacing Chicken with paneer
If you don't have skewers , directly roast the chicken in the tawa
You can use other oils like sunflower oil too
Love,
Varshini
Thursday, July 21, 2011
Its time to celebrate with Eggless Chocolate Almond Cookies
Yes its my Dear Bloggy's Birthday :)
Haiya..Finally the day has come to celebrate....
When i started this blog i was all passionate and everything..but then i wasn't regular..I should say last year i posted just 4 posts 3 recipes and my Welcome Post.
Only this year that too after March i was kinda regular...
I started this blog for my passion for cooking so named it "COOKING WITH LOVE AND FOR LOVE " This one year i have learned so many things but first and foremost be Regular and Patient to reap the result :)
Just like every other blogger i want my blog to be famous but for that i need to be dedicated and regular...which iam trying to achieve ...
I would really like to take this opportunity to thank my hubby a lot...Seriously without his encouragement and help..I would have never continued posting at all..seriously..coming back from work everyday at 9:00 PM and then cooking dinner is a big task for me(Lazy Lazy) ....I try to do most of my relaxed cooking/baking on Saturdays/Sundays...
Also I received The Versatile Blogger Award from dear Ikky and Rids too :)
Thanks to all my fellow bloggers for the encouragement ,who never miss to leave a lovely comment in my blog every time a new post appears..That gives so much motivation for the next post :)
So i have decided not to find reasons to be lazy and be regular and make my blog Famous someday :P Also take better Photos.. Soon :D
So here is my treat for the anniversary :)
I took the recipe from dear priti 's Blog :)
Ingredients:
All Purpose Flour - 1 1/2 Cup
Powder Sugar - 3/4 Cup
Cocoa Powder - 3 tbsp
Butter - 1/4 Cup [at room temperature]
Yogurt - 1/4 Cup
Baking Powder - 1 tsp
Vanilla Essence - 1/2 tsp
Almonds - Chopped 1/4 cup
Method
Whisk Yoghurt, Powdered sugar and Butter till creamy
Sieve flour, cocoa and baking powder
Now add the flour mix to the butter mix and fold well such that there are no lumps
Now add the chopped almonds and vanilla essence.
Preheat the Oven at 180C
Bake the cookies for about 10 - 12mins
Yummy cookies are ready :)
Love,
Varshini
Monday, July 18, 2011
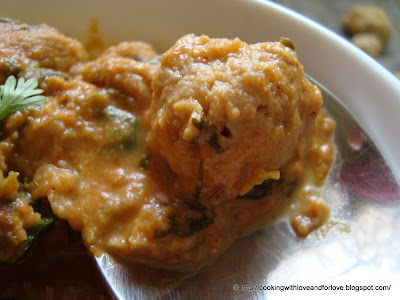
Methi Malai Soya
My hubby loves Soya chunks a lot...He was asking me to prepare soya chunks for a very long time but then i was postponing it since i dint wanna prepare it the same old way..I was in search of recipes with soyachunks and that too i wanted something that goes well with my Veg Pulao too :)
Finally I found it in Veg Bowl... Mallika is the lovely lady behind this amazing blog which has great recipes and amazing photography..Do check her blog ...its lovely:)
So here it goes
Ingredients
soya chunks - 2 cups
Kasuri Methi - 1/4 cup
Fresh cream/Malai - 1/4 cup
Tomato puree - Made from 2 tomatoes
Garam masala - 1 tsp
chilli powder - 1 1/2 tsp
cumin powder - 1 tsp
coriander powder - 1 tsp
cumin seeds - 1 tsp
water - 1/2 cup
Oil
Salt
Grind to Paste
Onion - 1
Green Chilly - 1
Ginger - 1 inch
Method
Cook soya chunks in boiling water with salt for about 10 to 15mins.
Once Cooked Drain it and keep it aside.
Heat oil in a Wok and add in cumin seeds
Now add in the ground paste and saute till raw smell goes
Add pureed tomatoes and all the dry powders and cook well
now add in little salt for gravy as we have cooked soya chunks with some salt
Add in the soya chunks and kasuri methi and cook for 10mins
Now add in the fresh cream and cook for another 5mins...
Now pour in 1/2 cup of water and let it simmer for 2-3mins.
Now garnish with coriander and server it with Veg pulao, roti, cahapathi :)
Can you see my reflection :)
Love,
Varshini
Labels:
fresh cream,
malai,
methi,
methi malai soya,
soya,
soya chunks,
vegetarian gravy
Friday, July 15, 2011
Veg Pulao
Veg pulao is my favourite rice dish...which I make quite often and every time guests drop by...I can call this as my perfect recipe...
Just follow this recipe and am sure you will be praised for this pulao :)
Serve Veg Pulao with any Spicy Veg Gravy
Ingredients:
Basmathi Rice - 1 1/2 Cups
Vegetables Chopped - 1 cup ( Carrot, Peas, Beans,sweet corn)
Onions - 2 Chopped finely
Tomato - 1
Green Chillies - 1
Cloves - 3
Cardamom - 3 pods
Cinnamon stick- 1 inch
Ghee - 1 tbspn
Salt - to taste
Water - 3 cups
Method :
Wash and soak basmathi rici for 10 mins
Warm ghee in a pressure cooker and add clove, cardamom and cinnamon stick
Now add chopped onions and saute till cooked .dont burn the onions
Add the slit green chilly.
Add the Chopped tomamto and saute till pulpy.
Add the chopped veggies and saute for 5mins.
Now drain all the water from the basmati rice and add it to the veggies and mix well.
Now add 3 cups of water and required salt and mix well.
Pressure cook for 2 whistles.
Yummy Veg Pulao is ready
Love,
Varshini
Tips:
Soaking the basmathi rice for loger time helps it to cook fast also grains dont stick to eachother
Dont overcook the rice else the pulao ill become mushy.
If using frozen peas and sweet corn...add it after adding the water in the cooker.
Wednesday, July 13, 2011
Mastering Baking - All about Baking - Oven Temperatures - Part 1
It has always been a herculean task for a person like me to find an information in the Internet Ocean especially regarding baking ...It has millions of resources but not all at one place for me to refer ...
Be it Temperature setting, Fahrenheit to Celsius, Measuring Cup size, Teaspoon, Tablespoon what not....
Also where to find chocolate chips , baking pans, chocolate rice/strands, cheese in my city...Oh my god the list is endless
I thought I should dedicate a space just for this in my blog...so that this will be a reference for my future endeavours (That's a huge word) and for other amateur bakers like me :)
Each week I will try to take up a topic and collect information and put it here..so that it will be useful for all of us :)
Let us start with
Oven Temperatures
Source for this info : http://www.joyofbaking.com/
Love,
Varshini
You can send in your mails regarding the topics you want me to cover ?
Also if you have any info or queries and want to share it with me..
Please mail me : cookingwithloveandforlove@gmail.com
Be it Temperature setting, Fahrenheit to Celsius, Measuring Cup size, Teaspoon, Tablespoon what not....
Also where to find chocolate chips , baking pans, chocolate rice/strands, cheese in my city...Oh my god the list is endless
I thought I should dedicate a space just for this in my blog...so that this will be a reference for my future endeavours (That's a huge word) and for other amateur bakers like me :)
Each week I will try to take up a topic and collect information and put it here..so that it will be useful for all of us :)
Let us start with
Oven Temperatures
Source for this info : http://www.joyofbaking.com/
Fahrenheit(F) Celsius(C) Gas Mark Oven Terms
225 F 110 C 1/4 Very Cool
250 F 130 C 1/2 Very Slow
275 F 140 C 1 Very Slow
300 F 150 C 2 Slow
325 F 165 C 3 Slow
350 F 177 C 4 Moderate
375 F 190 C 5 Moderate
400 F 200 C 6 Moderately Hot
425 F 220 C 7 Hot
450 F 230 C 8 Hot
475 F 245 C 9 Hot
500 F 260 C 10 Extremely Hot
550 F 290 C 10 Broiling
Love,
Varshini
You can send in your mails regarding the topics you want me to cover ?
Also if you have any info or queries and want to share it with me..
Please mail me : cookingwithloveandforlove@gmail.com
Labels:
All About Baking,
baking,
Mastering Baking,
Oven,
Oven Tempeartures
Monday, July 11, 2011
Eggless Blackforest Cake
Its time to Celebrate ...
Today is my dear Hubby's Birthday also my 55th post....What more i want to Celebrate...
I started out this blog, the very same month last year and i posted about guess just 3 recipes and then just forgot the blog...I was very busy with work...Didn't have much time to do anything...felt really guilty....Then i wanted this blog space to be all about my favs...So then included my makeup & skincare addiction...But then i started out proper blogging only in the month of March and renamed my blogspot with a relevant name ...So i can call it a roller coaster ride with it shares of both ups and downs....So from now on i will be a regular and plan for the 100th post atleast before this year end :)..
So wish me goodluck..Coming back to the cake
I wanted to make Blackforest cake for my hubby's birthday...because that is the first ever layered cake i tasted :D
So i actually used the recipe for Eggless chocolate cake from here Also saw so many videos on you tube about assembling the cake and referred VegBowl
And I bought heart shaped cake tin just for this :) ...It was perfect :D
Ok now to the recipe
Ingredients
For the Cake
condensed milk - 1/2 tin (200 grams)
self raising flour -125 gms
cocoa powder - 2 tbsp
Baking powder - 1 tsp levelled Spoon
baking soda - 1/2 tsp
melted butter - 60 ml
vanilla essence - 1 tsp
water - 100ml
For the frosting:
dark chocolate - grated 2 cups
fresh cream - 400 gm
Sugar - 5 to 6 Tbsp
For the filling:
cherries - 1 cup pitted and chopped
Full cherries for final decoration - 10
To be mixed into a soaking syrup:
sugar - 4 tbsn
water - Sugar
Method
For the Cake
1.Sieve the flour, cocoa powder, baking powder and soda bi-carb together.
2.Mix the condensed milk, flour mixture, 100 ml. of water, the vanilla essence and melted butter thoroughly.
3.Pour the cake mixture into a greased and dusted 150 mm. or 175 mm. (6" or 7") diameter tin.
4.Bake in a hot oven at 200 degree C (400 degree F) for 10 minutes. Then reduce the temperature to 180 degree C (350 degree F) and bake for a further 15 minutes.
5.The cake is ready when it leaves the sides of the tin and is springy to touch. When ready, takeout from the oven and leave for 1 minute. Invert the tin over a rack and tap sharply to remove.
6.Cool the cake.
For the Frosting
1. Cool the Bowl and the Hand Whisk in the freezer for about half hour
2. Now pour the chilled Fresh cream , Vanilla essence ,now add the sugar and whisk till peaks are formed
3.Refrigerate till use
For the Syrup
1. warm the water and dissolve the sugar and keep aside
Final Assembling
Now Cut the cake horizontally either 3 or 4 layers .
Take one layer and put it on the Plate and then sprinkle some 3- 4 tspns of sugar syrup .
Now spread the Cream on that layer and add some pitted and chopped cherries evenly
Now place the next layer and repeat the above steps till you place the last layer on the top
Finally decorate by applying cream all over the cake and decorate with the chocolate shavings/Strands and cherries..
And refrigerate overnight so that the syrup soaks the cake well :)
Can you see the layers..and the chopped cherry peeking out ?
Happy Birthday Dear Hubby :)
Thank you so very much...Without your support this cake would have never been possible...:D
Love,
Varshini
Info: I was unable to grate the chocolate due to clumsy hands...So i decorated with Chocolate Strands/Rice :)
Friday, July 8, 2011
Perfect Eggless Strawberry Cookies - Piped Cookies
I am always in search of Melt in Mouth cookies....I still remember some years back my mom got me some lovely yummy biscuits which just melted in my mouth...
Here in India Cookies are referred as biscuits...:)
As usual..I was blog hopping to find one...I found some hundreds of recipes..So I let dear google choose...I landed in Anushruthi's Divine Taste...Just as the name of her blog , Its a one divine place for all the foodies..well written ,lovely photography & lovely flowers...I have almost read all her post I can say..Please do check it out...Its Addictive
She has the recipe for the perfect eggless cookies...I modified that into a perfect recipe for Eggless Strawberry cookies...I know i can't stick to any recipe...
So here goes my recipe...
Ingredients:
APF/ Maida - 3/4 cup
Cornflour - 2 tbspn
Icing sugar - 1/2 cup
Butter - 1/2 cup
Strawberries - 2
Milk - 2 tbspn
Strawberry Essence - 1 tspn
Method
Preheat the oven at 180C
In a Mixie Jar/Blender blend the two strawberries with a 2tbspn of milk and make it into a paste.
Now take a big mixing bowl ,whisk the butter and icing sugar to a creamy consistency
To this add the strawberry paste and strawberry essence, blend well
Sieve Maida and courflour
Now add the flour to the wet mixture and mix well such that the consistency is smooth, creamy and lump free
Now put the cookie mixture into a piping bag a fit in your favourite nozzle(I used both star as well as drop flower) and pipe it in a greased baking tray . else you can make the usual round shaped cookies
Bake the cookies for about 12 - 15mins at 180C
Bake until top of the cookies turn slight golden brown...
can you see the teeny weeny bits of strawberry ? :D
Now let the Cookies cool and enjoy it with a cuppa Tea...
Tip :
Don't over bake the cookies as they might become little hard.
Love,
Varshini
Labels:
baking,
cookies,
Eggless Baking,
eggless cookies
Tuesday, July 5, 2011
Apple Pie /Tart with Chocolate Chips- Eggless
"An Apple a day keeps the doctor away" Who doesn't know this quote
I had so many apples lying in fridge for a very long long time....I wanted to use them up ..i dint wanna eat them as it is...
So i went through my copy of " The Pleasures of Vegetarian Cooking" by Tarla Dalal
I saw Apple Pie and started preparing the dough...but then i can never stick an recipe..so i prepared the filling in my own way....And it was a Huge hit So sharing it with you all..
So here is the recipe
Ingredients:
For the Crust:
Plain Flour/ Maida - 1 cup
Butter - 1/2 cup & 1Tbsp
Cold Water - 2 to 3 Tbsp
Sugar - 1 Tbsp
For the Filling :
Apples - 5
Butter - 2 Tbpn
Milk - 1/2 Cup
Sugar - 1/4 Cup
Vanilla Essence - 1 tspn
Chocolate Chips - 1/4 Cup (Optional)
Method
For the Filling:
Peel, De seed and Cube the apples
In a sauce pan add the butter and saute the apples until the juices come out
Now add in the sugar and saute for a minute
Now pour in the milk and cook until the milk is absorbed and now turn off the heat and add in the vanilla essence, mix well.
For the Crust:
Mix Flour and Sugar in a large bowl
Now add in the Cold Butter and rub into the flour with your finger tips
Gradually add ice cold water and make it into a dough similar to poori dough (Rolling Consistency)
Now divide the dough into two parts
Dust the rolling board with some flour and roll out one part
Cover your pie/tart tin so that the flute tin is covered properly
Now bake the pie/tart for about 8 - 10mins at 150C
Take out the half baked shells and Add in the Filling as well as chocolate chips
cover the filling with the other rolled out dough and prick it with knife
else you can roll out and cut it into strips and make a Crissy cross pattern
Bake it for 12 to 15mins at 180C or until you the Pie/Tart Turns Golden on the Top
Yummy Pie/ Tart is ready
Serve it with Vanilla IceCream
Can you see the chocolate chips peeking ?
I used Small Tart tins instead of Pie Dish :)
Love,
Varshini
Monday, July 4, 2011
Eggless Whole Wheat Butter Cookies
Cookies...Cookies...Cookies
"Think what a better world it would be if we all, the whole world, had cookies and milk about three o'clock every afternoon and then lay down on our blankets for a nap." -Robert Fulghum
It was a Saturday afternoon and I was sitting in my balcony and gazing....saw the roadside biscuit seller ..When he saw me drooling at his biscuits & cookies ..he came towards my home with handful of samples....I thought what a lovely day..free cookies...but then my hubby has warned me not to let anyone in....especially these sales people..so i had to ask him to leave immediately...finally i was tempted...so rushed into the house...browsed through for eggless cookies.....
I wanted to bake(read eat) some immediately...So when i saw eggless butter cookies in Divya's Blog i had to make(read eat) them rightaway ...But then i ran out of All purpose Flour(Maida), so i replaced APF with Whole wheat flour ( Healthy snacking i thought...indeed forgot about dear butter)
So here is the recipe
Ingredients
Whole Wheat Flour - 1 cup
Cornflour - 1/2 cup
Icing Sugar - 3/4 cup
Butter - 3/4 cup(
Vanilla extract- 1 tsps
Milk - 2 tbspn(optional)
Method :
Preheat the oven at 180C
Sift Wheat flour, icing sugar and cornflour
Beat the softened butter with vanilla extract
Now mix the dry ingredients to the wet ingredients
if the dough is very dry add little milk and make it soft
Divide them in to balls and flatten them with your palm
Place the them in a greased baking tray and bake it for about 18 - 20 mins or till golden brown
(I made the pattern using the table spoon :D)
Cookies are ready...your house would be filled with the lovely aroma :)
Love,
Varshini
Thursday, June 23, 2011
Eggless Vanilla Cake
Cakes have changed through times....Oh don't get me wrong i am not wee bit Philosophical...In those days say about 10 to 15 years ago i never had anything called Layered cake..Moreover never knew they existed ...I knew only those plain vanilla cakes covered with huge dollops of so called butter cream which i used to relish because i dint have a choice then...
But once i started having layered cakes with fresh cream ..I am unable to go back to those lovely plain cakes...Moreover i once had a plain cake which was smelling eggs ..Made me hate plain cakes ....So i thought if at all i bake it should be smell free( read egg smell free ) else i shall bake eggless
So when i was browsing through Divya's Blog...She has a lovely blog ..do check it out I came across recipe for eggless vanilla cake
As always i can never stick to the recipe i made some changes also halved the amount of ingredients...
Original recipe used refined oil but i replaced it with butter...I know i am still working on my waistline..:P
This was one of the best vanilla cakes i ever baked...yummy...My hubby loved this cake so much..he has asked me to bake this again...
Here it is :
Ingredients
Maida/ All purpose flour – 3/4 cup
curd – 1/2 cup
Sugar – 1/2 cup
Butter – 1/4 cup
Baking powder – 1/2 tsp
Baking soda – 1/4 tsp
Vanilla essence – 1/2 tsp
Cocoa Powder (Optional) - 1 Tbsp
How to ?
First Preheat the oven to 180C.
In a mixing bowl whisk curd and sugar till sugar dissolves
Add baking powder and baking soda , vanilla essence to curd mixture , mix well and leave it for 2 mins
Now slowly add in the flour and mix well without lumps to a smooth batter
Now grease a baking tin with butter and dust it with some flour
Pour in batter into the baking tin
If you want add Tbpn of Cocoa powder and swirl it to get a marbled effect
Bake it for 25 to 30 mins at 180C
Tada cake is ready ...yum yum..the aroma ...
Can you see the marble effect ?
Lessons Learnt:
Check the cake but inserting a toothpick/ knife in the center and if it comes out clean , your cake is ready.
Don't invert the baking tin immediately put it on a cooling rack for about 10- 15mins before removing cake from the baking dish else you will get a cake crumble just like mine...:p
Love,
Varshini
Saturday, June 18, 2011
Eggless Garlic Buns
As a kid i would wait for evenings to come...because in the evening my Dad would bring home yummy Bun Butter Jam ....or sometimes masala bun they would simply melt in my mouth....i still cherish those times....
Even after growing up still am fond of yummy jam buns, masala buns and pav buns...
So when i came across Eggless Garlic Buns in Rak's Kitchen i was simply transported back to those times...
I simply find reasons to bake...BAKING IS ADDICTION.....
Immediately baked them up and had them when they were still warm...as suggested by Raji :)
Since this was my first Bun baking attempt i dint wanna take risk so i just halved the amount of all the ingredients ....But then this bun baking has been my best experience ever ...right from the beginning....this a fool proof recipe....
For original recipe please visit Rak's Kitchen So here is the recipe...
Ingredients
maida 3/4 cup
Dried Yeast - little less than 1/2 tblsp
Water 1/4 cup
Salt 1/2 tsp
Sugar 1/2 tblsp
Olive oil 1 tblsp
For the garlic Spread:
Garlic chopped very fine 3-5 flakes
Butter softened 2 tblsps
Chopped coriander leaves 1 tblsp
Cheese grated - 1 tblp
Method
1.Add yeast , sugar and salt to warm water and dissolve the yeast well...let it stand for 5 - 10 mins...you will be able to see a frothy liquid ..this means the yeast is active
2.In a big bowl , add the flour make a dent in the centre and add the mixed yeast water.
3.Knead the dough with olive oil to smooth and pliable(add 1 or 2 tablespoons of water if water is needed,the dough should not be too stiff and dry,it should be soft,smooth and pliable)
4.Keep covered the bowl with either a clean wet towel or a cling wrap(wrap the bowl to cover it,not the dough). Here i used wet towel method and let it stay for 1 hour
5.Now the dough should have raised double in volume. knead it again a little
6.Now divide the dough into 2 equal balls and arrange it with enough gaps in a greased baking tray.
7. Mix Butter, cheese, garlic and coriander for the spread
8.Make a small slit on top using a knife to fill the garlic spread and spoon in the spread but not too deep
9.Keep it aside in warm place for 45 minutes so that the balls double in size.
10.Pre heat the oven for 180°C
11.Bake for 20-25 minutes or till you get a golden coloured buns.Just cook for needed,over baking makes it harder! - Herei baked my buns for 20mins
Yummy,fluffy,garlicky, cheesy buns are ready
Love,
Varshini
Labels:
baking,
eggless,
eggless garlic buns,
Garlic Buns
Subscribe to:
Posts (Atom)